


When tackling a construction or renovation project, one essential aspect that often gets overlooked is how to manage the waste that accumulates. Whether you’re remodelling your kitchen or clearing out old office space, having a reliable dumpster rental can make your cleanup process much smoother. It’s not just about throwing trash into a container; it’s about ensuring efficiency, staying on budget, and adhering to local regulations. With various sizes available to fit every need and affordable pricing options, understanding how to choose the right dumpster rental is crucial for keeping your project on track. In this article, we’ll explore everything you need to know about renting construction dumpsters—from types and costs to what can and can’t be tossed away. Let’s dive in!
Renting a construction dumpster is straightforward; simply contact your local waste management service or dumpster rental company, provide details about your project, and request a quote. Make sure to specify the type of debris you’re disposing of and the required dumpster size to ensure you receive the most suitable option for your construction needs.
Types of Construction Dumpsters Available
When it comes to choosing the ideal dumpster, the capacity needed will depend significantly on the scope of your construction or renovation work. Whether you’re embarking on a small home improvement project or managing a large commercial site, having the right size dumpster can make all the difference in efficiency and cost reduction.
Let’s explore the different types of dumpsters you might encounter:
- 10-Yard Dumpsters: These compact containers are great for smaller renovation projects like bathroom remodels or minor landscaping work. They can hold up to 10 cubic yards of waste, sufficient for disposing of smaller quantities of debris such as tiles, drywall, and other light materials.
- 20-Yard Dumpsters: If your project is slightly larger—perhaps planning a kitchen remodel or significant garage cleanout—a 20-yard dumpster might be just what you need. With the capacity to hold around 20 cubic yards of waste, it’s versatile enough for medium-sized projects without overwhelming your workspace.
- 30-Yard Dumpsters: For those undertaking extensive overhauls, such as major home additions or renovations, consider using a 30-yard dumpster. These spacious containers can typically accommodate up to 30 cubic yards of debris, making them ideal for larger amounts of construction materials and waste.
- 40-Yard Dumpsters: Finally, if you’re dealing with large-scale construction jobs or commercial projects that generate substantial waste, a 40-yard dumpster would be your best bet. With a capacity of around 40 cubic yards, these dumpsters are designed for heavy-duty operations and can handle everything from large sheets of metal to massive volumes of masonry debris.
Understanding how each size relates to your project’s needs ensures you optimize waste management solutions while managing costs effectively. Selecting appropriately sized dumpsters helps avoid paying for excess space you’ll never use or needing additional pickups due to underestimating your volume requirements.
Costs and Fees for Renting a Dumpster
Renting a construction dumpster comes with several associated fees that can vary widely based on your specific needs and the provider you choose. The first consideration is the rental fee, which typically ranges from $250 to $800 per week depending on the size of the dumpster and the duration of your rental. This cost is primarily influenced by how much waste you plan to dispose of; larger dumpsters naturally incur higher charges.
Additionally, you’ll need to account for delivery and pickup fees, which usually fall between $100 and $150 each way. These charges can impact your overall budget, especially if your project needs multiple pickups or extended rental periods.
Then there’s the disposal fee, an often overlooked aspect which may cost anywhere from $50 to $100 per ton. This fee applies when you fill your dumpster to capacity and can add up quickly depending on the weight of the materials you’re disposing of. For instance, heavy materials like concrete will significantly affect your total expenses, so it pays to have an informed estimate before you commit.
It’s wise to check if your rental company has weight limits on their dumpsters. Exceeding these limits can lead to additional charges.
Lastly, consider permit fees, which may range from $30 to $100, particularly if you need the dumpster placed on public property or the street. Local regulations can vary widely, so be sure to inquire with your dumpster rental company about any necessary permits for your specific location.
Breakdown of Costs
| Fee Type | Average Cost Range |
|---|---|
| Rental Fee | $250 – $800 per week |
| Delivery and Pickup | $100 – $150 each way |
| Disposal Fee | $50 – $100 per ton |
| Permit Fees | $30 – $100 (if needed) |
While these costs provide a general overview, it’s essential to remember that additional charges may arise if you exceed weight limits or hold onto the dumpster longer than your agreed-upon rental period. Such scenarios could inflate your total significantly, making it more crucial to communicate with your provider upfront regarding local pricing structures and potential extra fees.
Understanding these various costs allows you to plan effectively for your next construction project. Equipped with this knowledge, let’s move forward to explore how to determine the most suitable size and capacity for your disposal needs.
Selecting the Right Size and Capacity
When considering which dumpster to rent, understanding your project specifics can be a game changer. The available options range significantly in size—from small 10-yard containers ideal for home cleanouts to heavy-duty 40-yard dumpsters perfect for extensive construction projects. A fundamental consideration is the scale of the project; that is, how much waste will you realistically need to dispose of?
If you have only a few items or are tackling a small renovation, a smaller dumpster may well suffice. However, if you’re clearing out an entire office space or managing an extensive construction site, you might find yourself needing something more substantial.
Another crucial factor is the type of waste you’re dealing with. For example, heavier debris like concrete or shingles from roofing jobs may require a stronger dumpster with higher capacity so as not to exceed weight limits, which could lead to extra fees or logistical issues. Typically, more oversized containers, like the 20-yard variety mentioned earlier, are more suited to such materials since they allow for better distribution and less risk of overloading during transport.
It’s often recommended to err on the side of caution: if you think you’ll need a larger container, go ahead and rent it. You’ll save yourself from potential hassles down the line.
Additionally, assess the space available for placing your dumpster. Is it going on a street where permits might be needed? Is there ample room in your driveway or yard? These questions are essential because while you want to ensure you have enough capacity for waste, you don’t want your chosen location to impede other traffic or become inaccessible during your rental period. Planning where the dumpster will go not only streamlines collection but also keeps neighbors happy.
Finally, don’t overlook timing. If you anticipate that your project may take longer than expected—sometimes projects can extend due to unforeseen circumstances—it’s wise to rent a dumpster with some buffer space to handle any delays and additional waste that may arise.
Understanding these factors when selecting your dumpster can create a solid foundation for effective waste management and streamline your project as it progresses into the next phase.
What Can Be Disposed Of
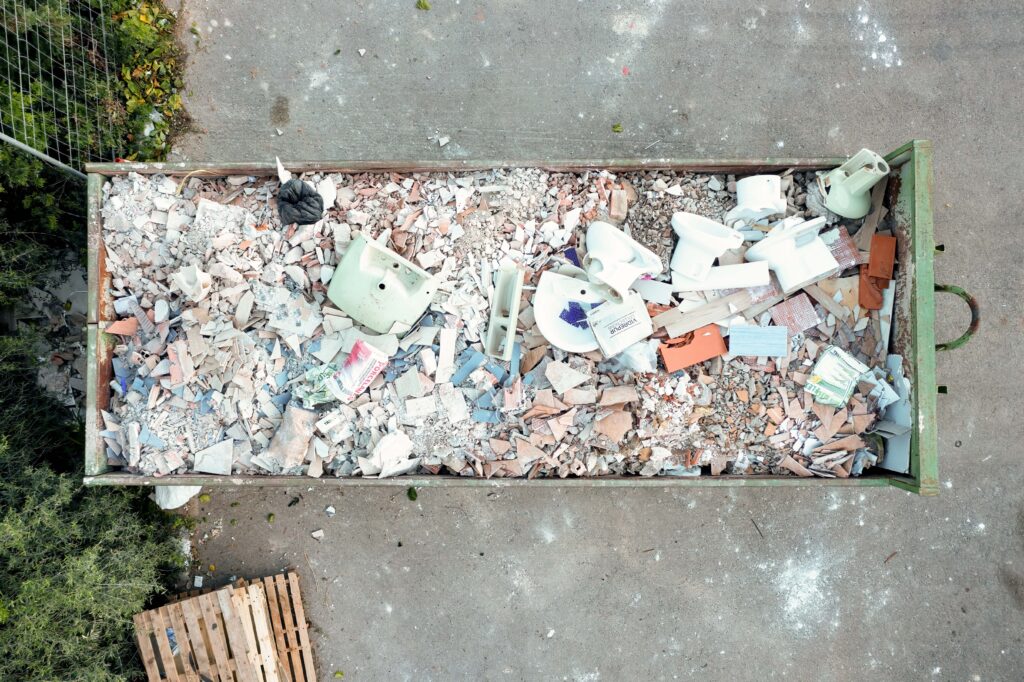
Knowing which items are permissible in your rental dumpster can save not only time but also money. Construction debris is the most common material thrown into these dumpsters. Think about all those renovation projects where bricks, concrete, and wood are torn out—these are perfectly acceptable to toss aside. However, the debris should primarily be clean; large pieces of contaminated materials might create extra disposal fees or complications.
- Allowed Items:
- Construction debris such as bricks, concrete, and lumber
- Household junk like outdated furniture or old appliances that need to be disposed of
- Yard waste, including branches and leaves collected during spring cleaning or after storms, can find their way into the dumpster too.
This leads us into another important category—household junk. Over time, everyone accumulates things they no longer need. Old appliances that are broken or simply no longer fit your lifestyle? Toss those into the dumpster without a second thought! Likewise, if there’s furniture that’s seen better days, it’s often just cluttering up space at home. Those items deserve a proper send-off to the landfill, especially when it makes room for something fresh and new.
Yard work can generate quite a bit of waste depending on your property size. Make sure branches and debris are cut down to fit securely in the dumpster to maximize space.
On the other hand, there are specific items you should absolutely avoid placing in your rental dumpster. Being mindful about these restrictions can keep you out of trouble with local ordinance laws.
Prohibited Items
Hazardous materials often top this list. Items like asbestos and pesticides pose significant health risks and must be handled with strict regulations. If you’ve recently uncovered any hazardous waste during a renovation, it’s best to contact professionals who specifically manage those types of materials.
- Prohibited Items:
- Hazardous materials (such as asbestos or pesticide products)
- Electronic waste, including unwanted televisions or computers—these require special disposal methods due to their components.
- Tires and car batteries are also off-limits because they can leach harmful chemicals into landfills.
Understanding these dos and don’ts enhances your experience when using a construction dumpster rental service and aids compliance with regulations. A clean and organized disposal process ultimately contributes to conserving our environment while saving you from potential fees associated with improper loading or illegal dumping practices.
Armed with this knowledge about what can and cannot go into your dumpster, you’re set to navigate your project efficiently. Next, we’ll look at how to facilitate the delivery and rental of your container seamlessly.
Dumpster Delivery and Rental Process
The rental process is straightforward and designed to get you started with your project as quickly and efficiently as possible. First, requesting a quote is typically as simple as reaching out to the rental company via phone or their online portal. While getting a quote, it often helps to provide detailed information about your project, including your location, what kind of materials you plan to dispose of, and how long you will need the dumpster. This ensures that you receive an accurate price based on your specific needs.
As you gather this information, selecting the right dumpster size becomes the next priority.
When selecting your dumpster, consider the volume of waste you’ll generate. Regular household cleanouts might only require a 10-yard dumpster, while larger renovations could necessitate a 30-yard option or more. Remember: choosing the right size not only ensures efficiency but also saves you money since overage fees can occur if you exceed the dumpster’s capacity.
After selecting the size, scheduling the delivery should be seamless.
To schedule delivery, coordinate with the rental company on a convenient date. Ensure there’s ample space at your location for the dumpster—ideally on a flat surface, away from trees or power lines. When making arrangements, inquire about any permits that may be needed if you plan on placing it on public property or in a heavily trafficked area.
Once everything is delivered and set up, filling the dumpster comes next.
When it’s time to fill the dumpster, load it strategically to maximize space. Begin with larger items at the bottom and stack smaller materials on top. It’s crucial to keep prohibited items—such as hazardous waste or electronics—out of the mix, as these can lead to additional fees or even make your waste disposal illegal.
Finally, knowing when to schedule pickup will conclude your rental experience effectively.
Once you’ve filled your dumpster or completed your project, you’ll need to schedule pickup with the rental company. Being proactive during this step is beneficial; calling them ahead of time allows for efficient planning on both sides and helps ensure they have a truck available for timely collection.
Additional Tips
In addition to this basic guide, there are some further considerations that might enhance your experience with dumpster rental:
- Safety First: Always wear protective gear when loading a dumpster—safety gloves and goggles can go a long way in protecting against accidents.
- Weight Limits: Be aware of weight limits to avoid extra charges; each dumpster has its own limit based on size and type.
- Keep it Clean: If renting multiple times near home improvement projects, maintaining organization around the dumpster site will minimize risks associated with clutter.
- Timely Communication: If you’re unsure about anything related to permits or prohibited items, don’t hesitate to ask the rental company—they’re there to help.
Understanding these steps will empower you during your project, making it smoother and more effective as you prepare for efficient waste disposal strategies moving forward.
Tips for Efficient Waste Management
Efficient waste management practices don’t just save money; they also play a significant role in creating a cleaner, more sustainable environment. It begins with sorting waste properly; separating recyclables from general trash is essential. For example, when you discard items like metal or glass, placing them in designated bins reduces the overall volume of waste going into your dumpster. This simple act maximizes your dumpster space and minimizes landfill contributions—a win-win.
After sorting, the next step is compacting materials.
Compacting waste can significantly maximize the space within your dumpster. Think about those large cardboard boxes stacked neatly yet taking up vast amounts of room. By breaking them down flat before disposal, you can create more space for other materials. Similarly, if you’re dealing with sturdy wood scraps or bulky furniture pieces, consider cutting them down to size. This strategy allows for better space utilization and means fewer trips to dispose of extra waste—convenient for both time and budget.
Speaking of budget, scheduling timely pickups is crucial.
To maintain an efficient waste management routine, you should schedule timely dumpster pickups. There’s nothing worse than completing a project only to have a full dumpster lingering longer than necessary. This situation can lead to additional fees that add up quickly. By tracking your project timeline and proactively scheduling pickups ahead of time, you can avoid unexpected costs while maintaining a clean worksite.
These tips not only help in reducing costs but also contribute to sustainable construction practices which benefit the environment in the long run.
For more detailed guidelines, be sure to visit Tiger Sanitation for comprehensive dumpster rental solutions tailored to your specific needs.
Incorporating these tips into your approach can greatly enhance not just efficiency but also sustainability in your waste management practices. Every small effort counts towards building a greener future.